How to Create a New Pool
Creating a new market on Cetus is completely permissionless now (currently live on Sui). Project owners, token issuers or even community supporters can come onto Cetus to create a pool for a trading pair if the pool does not exist. Project owners and token issuers are usually persons who are most recommended to conduct the pool creation, because they usually have relatively sufficient initial liquidity to add to the pool, ensuring the pool can handle swaps well from the beginning.
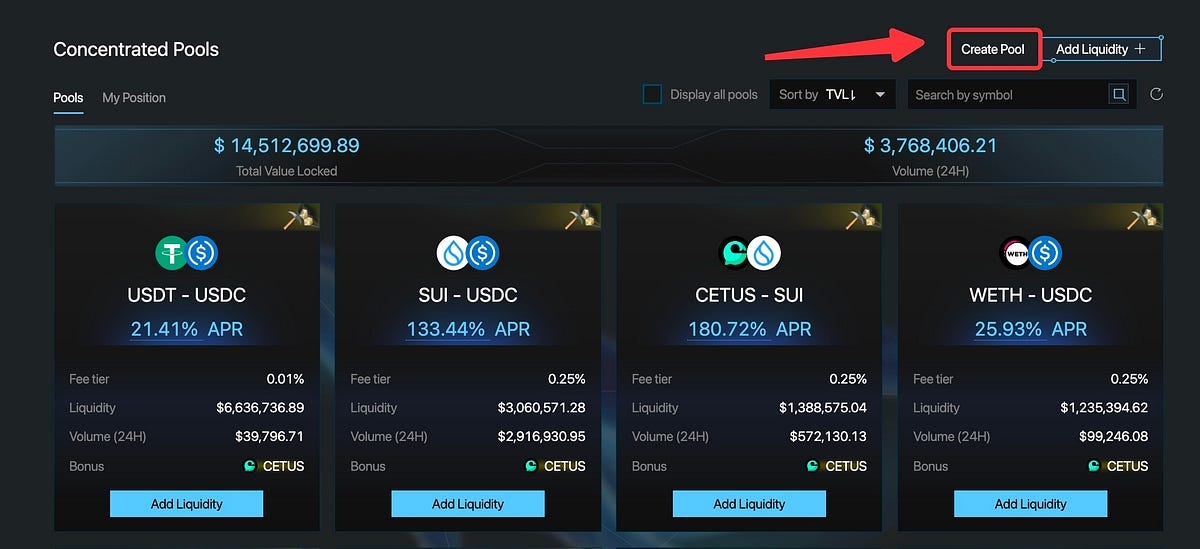
1. Under the pool page https://app.cetus.zone/pools, click “Create Pool” at the top right corner to enter the pool creation procedures. Before you create a new trading pool, you can search or scroll down the page to check if there’s an existing one.

2. When creating a new pool, please specify the pair you would like to set up. Currently only SUI token and CETUS token are accepted as the quote token for a permissionless pool. For the base token, you can select it from the dropdown list or directly input the exact coin_type address of your token.

3. Next, select a fee tier for the pool you are going to create. There are four tiers that are supported now, which are 0.01%, 0.05%, 0.25% and 1% respectively. For most non-stable trading pairs, 0.25% is always the most adopted fee tier. For a relatively rare asset that is rarely traded, 1% can be selected to give enough motivation to LPs. 0.01% and 0.05% are usually used for stable trading pairs. Please select a suitable fee tier for your pool if you want the pool you created to be utilized by more transactions.

4. Then, you need to set an initial price for the pool. Please specify a reasonable starting price, otherwise you may need to bear excessive impermanent loss. Besides, you need to set a price range which you want to allocate your initial liquidity into. The initial price must be within the range you selected.

5. After setting all basic parameters, you need to enter the liquidity amount you want to provide to the pool as initial liquidity. Just input the amount for one of the tokens, the amount for the other one will be automatically calculated according to the starting price and the price range you select.

6. You’ve entered all needed parameters, you can confirm to create the pool and approve your wallet to add initial liquidity. You’ll get your position NFT after your liquidity is successfully added.
7. After a pool is created, it usually takes a few minutes for the pool to be displayed or searchable on the front end interface of Cetus. Users will be able to start enjoying swapping and LPing with this new market you just created.
Last updated